 Welcome to Olli Ella!


We all know there's nothing better than nabbing the biggest egg come Easter morning, especially when it's filled with a Cozy Dinkum surprise! This Easter, we've teamed up with our amazingly crafty friend Kathryn of @cardboardfolk to create an eggcellent papier mâché DIY hatching egg for our snuggly Cozy Dinkum friends.
It's a super easy craft, and you probably have the bits and bobs needed lying around the house; PLUS, it's sure to keep little hands busy for hours! WIN!
It’s time to get cracking on this cozy Easter craft!

-
 01Tear and Mix
Tear up the newspaper and brown paper into strips about 2-3 cm wide and 10cm long, then make up a mixture of white glue and water at a ratio of 2 parts glue to 1 part water. Mix the 2 together in an old bowl with a paint brush until well combined. -
 02Inflate & cover!
Blow up the balloon so that it is large enough to fit your Cozy Dinkum inside – we made ours about 26cm high. Working in sections, use the paintbrush to paint glue mixture on the balloon, then add strips of newspaper, coating with more glue over the top and smoothing out the wrinkles. Overlap the newspaper and make sure you cover the whole balloon. -
 03Layer & dry
Allow the first layer to dry, then add another 3 layers to the balloon, alternating brown paper and newspaper to make it easier to see which sections need to be covered. We added all of our final layers at the same time rather than drying in between. Allow the Papier mâché to dry for 24 hours, or until it feels hard, with no give when you push on it. -
 04Paint & decorate!
Use scissors to cut off the knot in the balloon to deflate it, and then decorate your egg! We used paint and dot stickers to create a pattern on ours. -
 05Cut & coat!
Use a box cutter to cut the balloon in half horizontally. If you decide to leave the inside of the egg unpainted like we did, double check that the glue has sealed the newspaper print by rubbing your finger over the inside, if needed add another coat of the glue mixture to the inside and allow to dry to prevent the ink from transferring to your Cozy Dinkum. -
 06Assemble with love
Pop your Cozy Dinkum into the base of the egg, we put down some shredded paper first to make it comfy. -
 07Seal & surprise!!
Put the top of the egg back on to the base and seal it up with tape, ready to surprise someone special!
-
 08Voila !
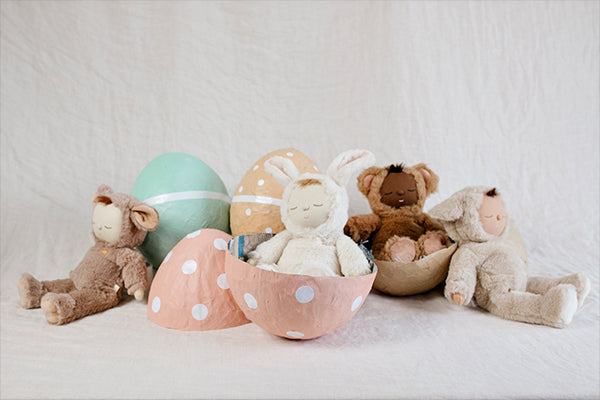
Pair with your Easter Basket for an eggcellent Easter Holiday!
How sweet do these four look freshly hatched and cozied up together?
Collect all four and get crafting for maximum snuggly cuteness!

