 Welcome to Olli Ella!


Holdie Animal Sensory Playscape
Our little ones absolutely delight in exploring their world through their senses. Sensory play encourages learning through exploration, curiosity, problem solving and creativity. It builds cognitive skills and influences how your child learns about their world. We've teamed up with the very talented sensory_playtime_ to bring our Holdie Animals to life in their very own sensory playscapes.
This step-by-step blog can be adapted to any playscape with a sprinkle of imagination!
Create your own DIY Playscape

-
 01Create backdrop
Take one of your large pieces of cardboard. Begin with the bottom of the play scene. Using your dark blue paint, begin to cover the card edge to edge.
Once that's done and still wet, begin applying your light blue in wobbly stripes across the dark. You don't want to mix them really, try to keep some contrast between the dark and light blues. Get creative until it looks like the ocean! Set aside to dry. -
 02Prepare the setting
Begin the background for the play scene. Cover the card in pastel yellow from edge to edge. Set aside to dry. -
 03Draw you sunbeams
Once the yellow pastel has dried, grab a plate and set it on the bottom of the card to get your sun shape. Using a ruler, you now begin to draw the sunbeams, from the sun to the edge of the card in equal sizes. -
 04Paint & decorate!
Begin to apply your burnt orange colour to the sun within your drawn sun. If you used acrylic paint for the pastel yellow background, you can gently apply masking tape to get the straight lines on the sunbeams. Otherwise if you've used poster paint, just take your time and pay attention to the edges. Set aside to dry. -
 05Draw your waves
Draw a wave and cut it out. Using the same colours and technique as the ocean base, paint the wave. To get that foamy top, just dab white to the crest of the wave. Create 3 of these. -
 06Draw your rocks
Draw a large rock and cut it out. Paint it, don't worry about it being one uniform colour, little bits of contrast will get it a more "rocky" texture. Once dry, add some cracks and some seaweed. Set aside to dry. -
 07Finishing touches
Using left over card, cut out some right angled triangles (roughly 5cm x 5cms) and hot glue these to the back of your waves and rock to help support them. Then you want to cut out 2 large right angled triangles (roughy 40cm x 5cm). And hot glue them as support to the back of your background.
-
 08Voila !
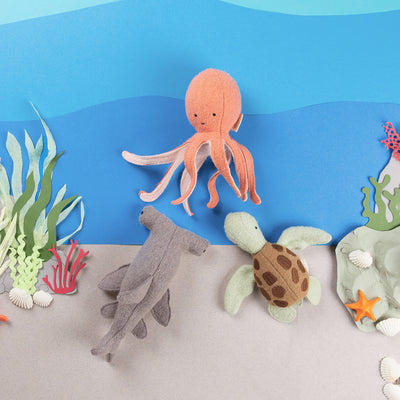
Piece it all together. Your hot glue gun, stick the background to the base, making sure the supports are also on the base. Arrange your waves and rock until happy, then hot glue the edges in place. Ta da! - you have a fabulous holdie ocean play scene.
These playscape possibilities are endless!
Here is some more beautiful inspiration, this can be built using similar steps above! Simply adapt the colours and shapes and add in a sprinkle of imagination.


Holdie Set Marine Animals
19.50 USD
Regular price
39.00 USD

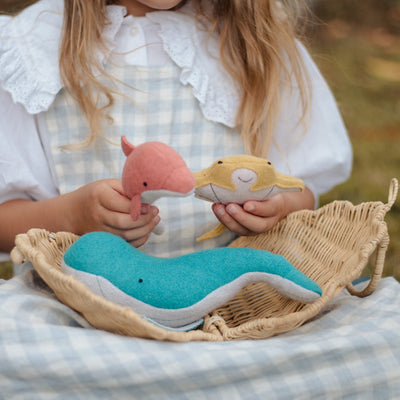
Holdie Set Ocean Animals
19.50 USD
Regular price
39.00 USD